Aug 29, 2008

Block wall

SPRING 2008!
As soon as the weather warmed up we started. The first job inside was to build the cinder block wall around the wood stove. The blocks were laid 'dry' that is there is no mortar between the blocks. There is however re-bar and concrete in the columns inside the block. The copper water pipes for the stove's hot water tank and the shower also enter through the cavities in the block. Lots of measurements need to be taken here as there are certain safety distances that must be maintained from the firebox to combustible materials. Because the interior of the sauna is 9' x 11' each inch counts.


......
All of this is needed because the wood stove is fed from the dressing room, not from within the sauna room itself. We've made saunas in the past where the wood stove is fed from inside the sauna room. It always makes a mess no matter how hard we try to keep it clean. So, this time we designed the sauna so that we can make the fire in the stove from the dressing room and keep all the wood away from the clean sauna floor and benches. All of that required a fireproof wall.

Framing the roof

Summer seems to end more quickly whenever you have a roof to build and this one was no exception. The race was on. The cold Autumn rains were winning.

The ceiling boards went up, we squared them and began working the rafters...and not the camera. This is the only picture of the entire roofing project I could find.

On top of the ceiling boards went the vapor barrier (6mil poly). The 2 x 6 rafters were next. I considered using 2 x 8s or10s and with that added space more insulation could be used, but...this is a sauna, not a home. Our wood stove will be used to create massive amounts of heat quickly for relatively short periods of time. We won't be living in this building where the heat would need to be conserved. So in the end I used 2 x 6s and 6" fiberglass insulation. I did lay a 6" strip of ridge vent mesh from eve to ridge on top of the insulation for venting, aluminum eve and ridge vents were also added. On top of all this went 1/2 plywood sheathing, a tar-paper product ( I can't remember the name of the stuff) and finally the shingles. Oh, and yes we framed in the chimney and installed the roof jack and the insulated chimney to the stove.\

(UPDATE: November 9, 2008 - We've learned that you should NOT put lots of big stones in the top of this stove. By big I mean the size of a grapefruit. Lots of stones (perhaps 10 gallons ,suck up tons of heat and render the stove inefficient. Once we removed the vast majority of these and only used about two gallons of stones the sauna heated up great. We are considering adding additional rigid insulation (2") on the interior of the ceiling of the steam room and then covering it with cedar to speed up the heating time. Right now it takes about an hour to get the steam room to 140* F.)

Now, the last step to prepare for the first winter was to make a temporary door and install the three windows. Using some left over 1/2" plywood and 2x4s the door was a snap. The windows also went quickly. The cold and snow were next, and the long wait for spring began.

I think I should mention here that all of this work was being done on weekends and by this time we were all getting tired. Using a calendar it became clear that at this rate it might be 2027 until the project was complete so we vowed to take two weeks vacation in the spring and get it done.

Aug 18, 2008

The Ceiling

The roof of our sauna is built backwards. That is we first installed the ceiling, then the vapor barrier, rafters, insulation, plywood and shingles. All from the outside!

...........

The important part here is to do both sides at the same time. This way you can keep the tendency of the ridge pole to warp to a minimum. If you do one side then the other, the ridge would slowly be pressed down and out towards the unfinished side ultimately leaving you with a noticeable bow. By working both side together you not only can keep this from happening but you can also check to make sure everything looks good on the inside. You don't want one side racing in front of the other so that joint lines don't match up from one side of the ceiling to the other. You can see in the middle picture I started in the center of the ridge and worked out towards both ends. This cuts in half any problems that may enter from boards drifting.

............

Here you can see the porch end and see that we've trimmed off the tailings at the eves. All that means is that each 2 x 6 ceiling board wants to run longer or shorter than it neighbor. After all the boards are fastened we trim them all the same with a skill saw.

Thanks to everybody!

Thanks to good friends and family the end of last summer couldn't have been more special to us. Priscilla and I would like to thank each and every one of you who helped in so many ways. The building of this sauna is more to us than just saw dust and picnics. It has been about building a life.

We have a special book we like to call our 'dream-book'. In it, each weekend morning we lazy around and talk. I draw out plans on the pages of that book because sometimes I'm not so good at describing things and Priscilla is not so good at making sense out of my non-sense and drawings work just fine for both of us. That book helps us, because right now we only have weekends together; the dream book helps us to re-unite.

We talk and plan and dream on those mornings. Each of you are in our dreams and play a very big part in them. Even though some of you may not have been able to take part in the logoramathon you were there in our hearts.

Thank you one and all!

Bruce & Priscilla ( sometimes known as Brucilla )

Aug 17, 2008

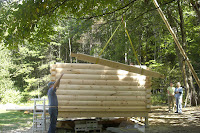
Erecting the gables and ridge pole

......

......

......

......

......

......

......

Logoramathon Lunch

Logoramathon Picnic Lunch: Summer 2007
......

......

......

Aug 15, 2008

LOGORAMATHON (part III)

......

......

......

......

......

Aug 14, 2008

LOGORAMATHON (Part II)

......

......

......

......

......

......